Headers
In my previous post I gave a quick overview of the Arduino Pro Mini. This board features through hole connectors without any headers attached. Therefore, to connect anything to the board it is necessary to solder on some headers - but what kind?
As ever, there is a lot of choice (there is always so much to choose from with electronics!). The key things to decide on are the following.
- Gender - female headers are good for wiring into a breadboard, male headers can be inserted directly into a breadboard.
- Orientation - angled headers allow a connection to be made in line with a board rather than at right angles.
- Special types
- Stackable headers provide a regular female header with a male pin long enough to expose a male header below the board.
- Double sided male headers - these allow you to connect female headers together.
As a minimum you will probably just need some regular female and male headers. Any additional headers will depend on your project.
Mounting
The main thing you have to consider when choosing headers is what you are planning to mount your components on. The main mounting options are the following.
- Breadboard - solderless board where components can be wired together
- Stripboard which comes in several varieties - components have to be soldered to the board
- Plain - each hole is isolated and components must be wired/soldered together on the board
- Strip - strips of holes are connected by metal tracks
- Tripad - strips of 3 holes are connected by metal tracks. This is a good compromise between plan and strip
- PCB - if you have a specific circuit planned out you can get a custom PCB produced which you can mount your components on
Your choice of mounting will likely be guided by the desired final size, cost and whether you are comfortable soldering components.
I have done a bit of soldering with Tripad boards with moderate success. However, it's hard to beat the convenience of a breadboard.
When I got my Arduino Pro Mini I wasn't sure about the best connectors to solder onto the pins. In the end I decided to attach female headers to all of the pins to make it easy to wire the Pro Mini into other components with normal jumper wires. The very next morning I came across a Sparkfun article about the Pro Mini which featured the following picture.
 I think this picture actually shows off a couple of great ideas.
Inspiration
When I got my Arduino Pro Mini I wasn't sure about the best connectors to solder onto the pins. In the end I decided to attach female headers to all of the pins to make it easy to wire the Pro Mini into other components with normal jumper wires. The very next morning I came across a Sparkfun article about the Pro Mini which featured the following picture.
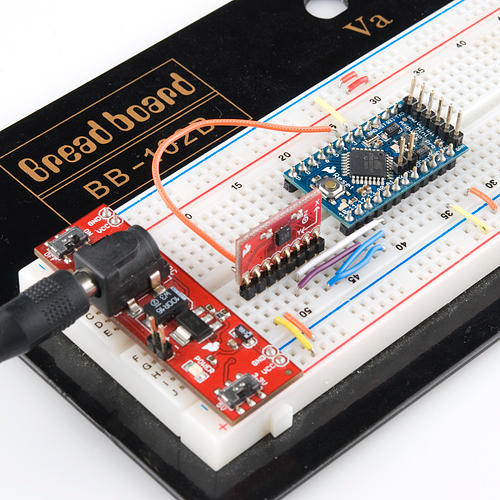
- Attaching male headers to the Pro Mini allows the board to plug directly into a breadboard. I may try this with the next Pro Mini which I buy.
- Attaching right angled male headers on one side of a chip allows it to be mounted in a very compact way. Mounting female headers on the other side would allow jumper cables to be used to connect any extra pins which were needed.